1. With Liferay IDE In Eclips
2. With Liferay Plugin
2. With Liferay Plugin
Creating theme from Liferay IDE In Eclips:
We need following resource for development of theme in liferay
Step 1:
We need following resource for development of theme in liferay
Step 1:
- liferay-plugins-sdk (Zip file)
- eclipse-jee (Zip file)
- liferay-portal-tomcat (Zip file)
Extract these file in the same folder
Step 2:
Open Eclips and go to the
Help menu single click on it ->Install new software ->click on it a new window will be open
in the drop down pest http://releases.liferay.com/tools/ide/eclipse/helios/stable/
Help menu single click on it ->Install new software ->click on it a new window will be open
in the drop down pest http://releases.liferay.com/tools/ide/eclipse/helios/stable/
->select all -> next-> finish
Step 3:
Go to the Window menu ->click on it ->go preferences->Liferay->click on it and go to the Installed Plugin SDK-> click on it ->add->browse-> select Plugin SDK folder which you have extract in folder ->tick check box ->ok
Same way go to server click on it and set runtime Environment
Step 4:
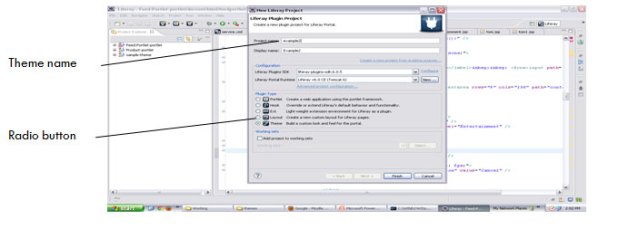
go file menu->new->liferay Project ->
go file menu->new->liferay Project ->
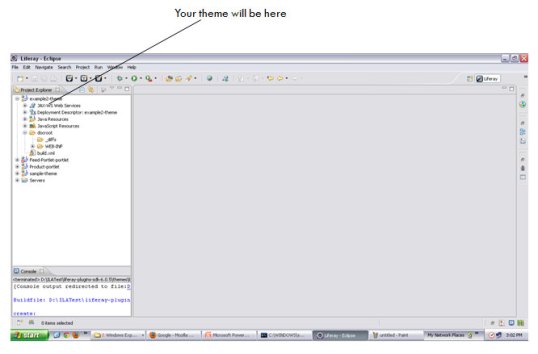
Give theme Name (Example2 theme) ->tick radio button->
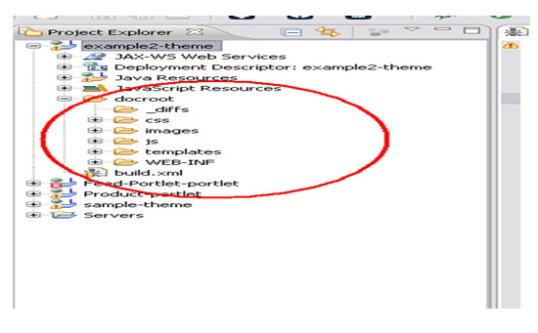
In the red circle there is docroot and under docroot there is following folder:
1._diffs
1. css
2. images
3. js
4. templetes
5. Web-INF
1. css
2. images
3. js
4. templetes
5. Web-INF
=> coppy css, images, js, templetes and pest these four folder into _diff folder
=> expend _diffs =>expend css folder =>IT look like this
- Application.css
- Forms.css
- Base.css
- Layout.css
- Custom.css
- Main.css
- Custom_common.css
- Navigation.css
- Dockbar.css
- Portlet.css
=> go to the custom.css and OPEN it
Note:
You showld change anything in custom.css file
You showld change anything in custom.css file
What is CSS?
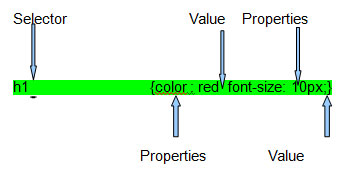
Styles define how to display HTML elements
External Style Sheets can save a lot of work like Make a global change ,More flexibility ,Change the appearance and layout of all the pages
Styles define how to display HTML elements
External Style Sheets can save a lot of work like Make a global change ,More flexibility ,Change the appearance and layout of all the pages
A CSS comment begins with “/*”, and ends with “*/”, like this
/*This is a comment*/p {text-align:center;
/*This is another comment*/color:black;font-family:arial;}
/*This is another comment*/color:black;font-family:arial;}
id Selector Example
#para1 {text-align:center;color:red;}
class Selector Example
.center {text-align:center;}
p.center {text- align:center;}
#para1 {text-align:center;color:red;}
class Selector Example
.center {text-align:center;}
p.center {text- align:center;}
3. Velocity
- Velocity Language consists of…….
- Java-based template engine
- Open source software project
- Reference objects defined in java code
- Control statements
- Arbitrary java methods
- Java code cannot be embedded in pages
And here is it application:
A. Web applications.
B. Source code generation.
C. Automatic emails.
D. XML transformation.
B. Source code generation.
C. Automatic emails.
D. XML transformation.
Example:
#set ($z = “Velocity”)
Here: References begin with $ to get something. Directives begin with # to do something.]
#set ($z = “Velocity”)
Here: References begin with $ to get something. Directives begin with # to do something.]
here is examole of Hello attuneinfocom world
<html>
<body>
#set( $foo = “Attuneinfocom” )
Hello $foo World!
</body>
</html>
The result is a web page that prints “Hello Attuneinfocom World!”.
<body>
#set( $foo = “Attuneinfocom” )
Hello $foo World!
</body>
</html>
The result is a web page that prints “Hello Attuneinfocom World!”.
Coment in velocity
## This is a single line comment
#*
Thus begins a multi-line comment
*#
#** This is a VTL comment block *#
## This is a single line comment
#*
Thus begins a multi-line comment
*#
#** This is a VTL comment block *#
Types of references in the VTL:
Variables Examples: $foo , $mudSlinger, $mud-slinger, $mud_slinger
Properties
Example : $customer.Address, $purchase.Total
Methods Example: $purchase.getTotal(),
$page.setTitle( “My Home Page” ), $person.setAttributes( ["Strage","Weid“, “Excited"] )
Variables Examples: $foo , $mudSlinger, $mud-slinger, $mud_slinger
Properties
Example : $customer.Address, $purchase.Total
Methods Example: $purchase.getTotal(),
$page.setTitle( “My Home Page” ), $person.setAttributes( ["Strage","Weid“, “Excited"] )
Logical Pration
ogical AND
#if( $foo && $bar )
<strong> This AND that</strong>
#end
logical OR
#if( $foo || $bar )
<strong>This OR That</strong>
#end
ogical AND
#if( $foo && $bar )
<strong> This AND that</strong>
#end
logical OR
#if( $foo || $bar )
<strong>This OR That</strong>
#end
logical NOT
#if( !$foo )
<strong>NOT that</strong>
#end
#if( !$foo )
<strong>NOT that</strong>
#end
Velocity templates default files init_custom.vm: This file allows you to override and define new velocity variables.You can initialize custom Velocity variables in this template. You can also set values to the existing variables to override their existing values. The variables defined here can be referenced in the other four templates.
navigation.vm: This file is called by portal_normal.vm and provides the HTML to make the navigation menus
portal_normal.vm: This file controls the basic skeleton HTML of the page that Liferay will serve.
portal_pop_up.vm: This file controls the layout of portal templates for pop-up notifications.
portlet.vm: This file wraps the content of every portlet.
Note : If you want to change any thing in your css you should only use portal_nomal.vm file
How to give directives :
include directive
#include( “snippet.html” )
#include( “snippet.html” )
parse directive.
#parse (“navigation.vm”)
#parse (“navigation.vm”)
stop directive
#stop
#stop
for more information :- liferay development and liferay theme development.






1 comment:
Thanks for your nice information code is working fine thanks for sharing..
Magento Services
Post a Comment